Dreamweaver 4 & MX
|
Dreamweaver 4 & MX
|
|
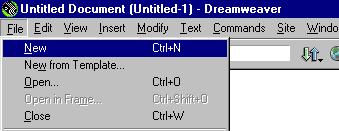
Welcome to Free Gear Design's quick and simple guide to creating Flash Buttons and installing them in Dreamweaver 4 & MX. Using Flash Buttons in your site can greatly enhance the look of your site and give it a sense of professionalism. To add Flash Buttons to your site is simple by following the steps below. Sometimes it is easier to Print these instructions and then read through them rather than viewing them on-line, press Ctrl+P on your Keyboard to print. 1. Firstly you will need to Open Dreamweaver 4 or MX. If you require a FREE trial version of Dreamweaver then visit http://www.macromedia.com/downloads/ . 2. Click on File on the Menu Bar then press New or press Ctrl+N
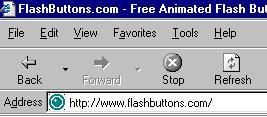
3. In the Address Bar, usualy located at the top of your browser (Internet Explorer, Netscape, Mozilla ect..) type www.flashbuttons.com and press Return Key (Enter button) on your Keyboard.
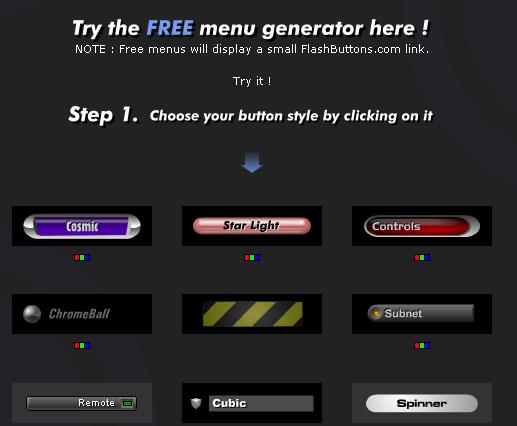
This particular site offers excellent FREE sample Flash Buttons and if you subscribe a more varied range of buttons to choose from. There are also many sample buttons to choose from and the great point here is that you don't have to download any software. 4. There are three main steps set out in this site firstly Scroll Down the page until you reach the Menu Generator. 5. Currently there are several pages with different styles on to choose from click on the Numbers Below the text "More button styles" till you find the button that most suits you.
Remember if you become a member you will have a greater choice of button styles. Current membership price is $20 for a whole which is excellent value. 6. Once you have chosen your button Double click on it.
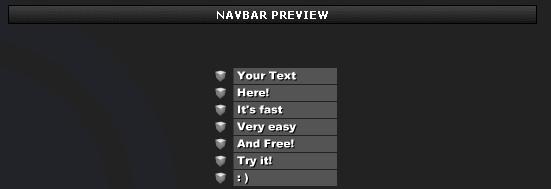
7. You will then see the Navbar Preview screen.
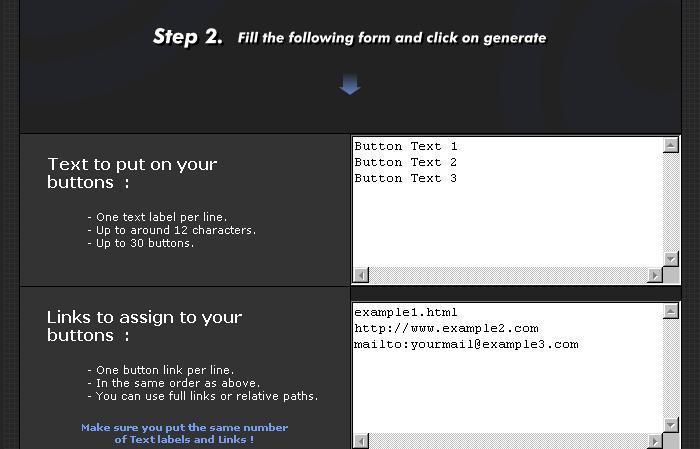
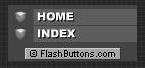
8. Step 2 is to Enter the Text you require on your buttons. (HOME, INDEX ect..)
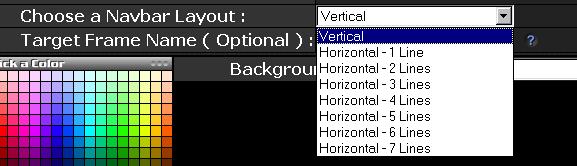
9. Enter the Links assigned to the text above. (so if the first word on the text button above was Home then the first link in the box below will be your home- page). Tip: If the page your buttons will appear on are in your website then only the page is needed i.e index.htm, if the button is for a another website then the whole address is needed i.e http://www.freegeardesign.co.uk. 10. Now chose the Layout for your button.
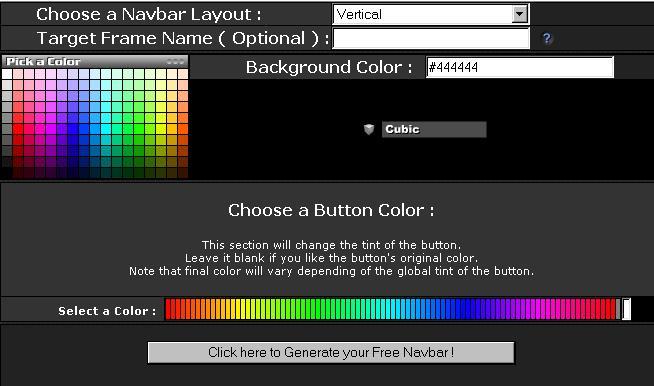
11. Now choose the Background Colour and Button Colour.
Tip: Target frame is related to frames that you use on your page but in this example we are using a standard page without frames. 12. Click on the Generate your Free Navbar ! button. 13. You will now see what your Button will look like.
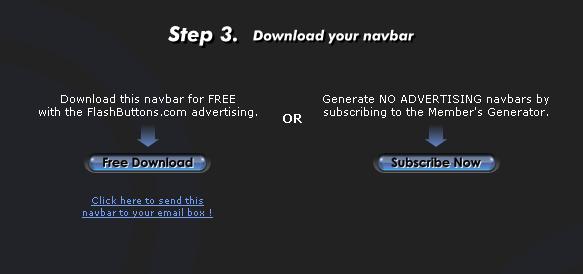
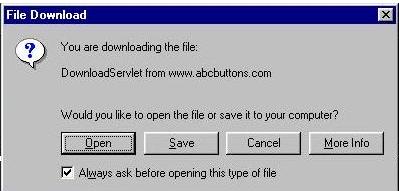
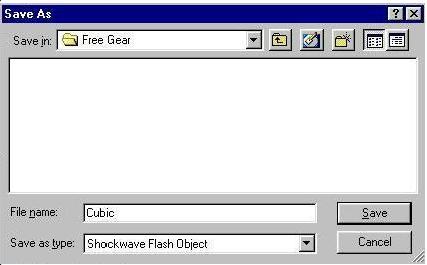
14. Step 3 click on the Free Download button. Tip: To show your Flash Buttons without advertisements click on the Subscribe Now button. 15. When you have clicked on the Free Download button a dialogue box will appear click on Save. 16. The Save As dialogue box will appear choose the correct Folder to save your Flash object in. (usually this will be the same folder as the rest of your web pages)
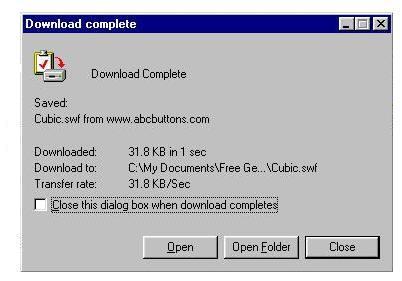
17. Click the Save Button. 18. A final dialogue box will appear stating the download to your folder is complete now click the Close button.
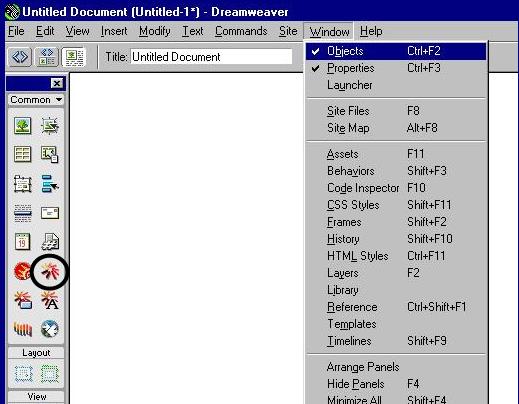
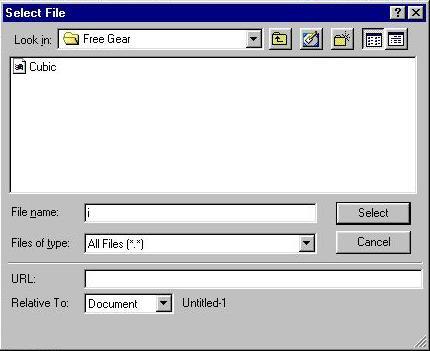
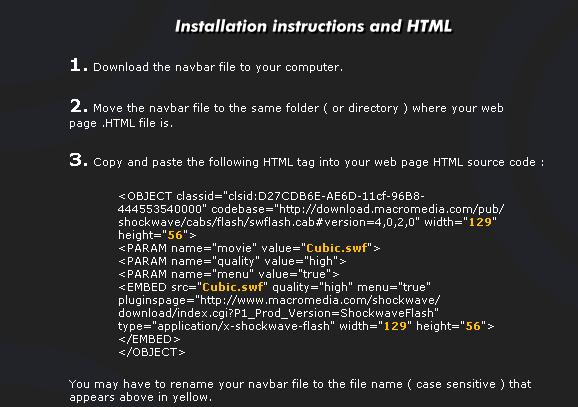
19. Return to your Dreamweaver 4 Page you originally created. If the Objects Bar is not showing click Window on the Menu Bar then Objects. 20. Once the Bar is showing click the Insert Flash Button as circled above. 21. A dialogue box will appear, find the Folder you downloaded the Flash object to and click on the Object.
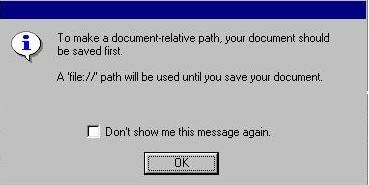
22. Then click the Select Button. 23. If a dialogue box appears with the message below click on OK.
Tip: If you are Using Dreamweaver4 you Do Not have to Insert the HTML into the code view shown at the bottom of the page because the procedure in part 24 has automatically done this.
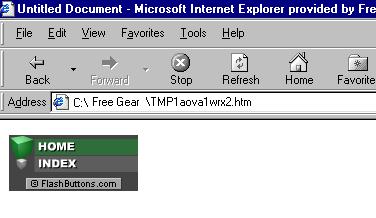
24. Press F12 0n your Keyboard to see you Button in action, unlike FrontPage 2000 you do not have to save your file (page) to see your page in the browser view as Dreamweaver creates a Temporary File.
25. Test your Links.
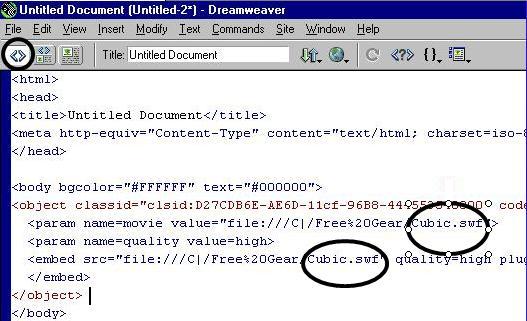
26. If your Flash Button is not working you may need to go into the HTML Code View and check the name stated for the Flash Object is the same as the one in your HTML also makes sure it is the same case as it can be Case Sensitive.
27. Finally save your page to the same Folder as the Flash Object and when you have finished creating your page upload them together to your site address. If you need a FREE FTP then visit http://www.ftpx.com . I hope you found the tutorial useful and easy to follow to go to the Free Gear Design main index or e-mail click on the relevant button below.
Add this Page to Favorites | Feedback Form | Tell A Friend | Affiliate Program | Main Index Add Website | Site Update | Create A Website | Tutorials | Help |